Crunchie Drip Cake!

*This post may contain affiliate links. Please see my disclosure for more details!*
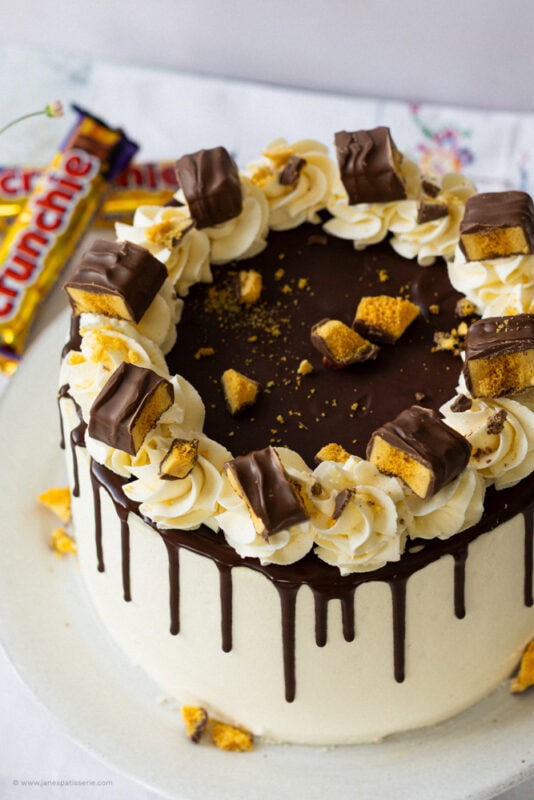
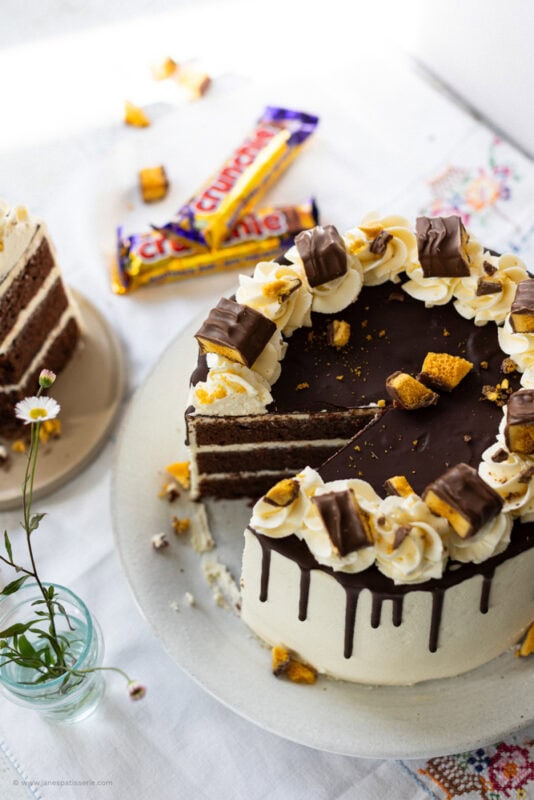
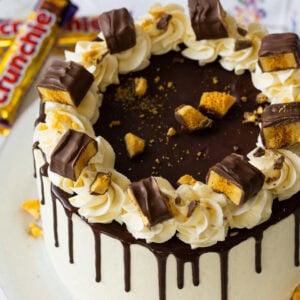
A three layer chocolate drip cake with honey buttercream frosting, a chocolate drip, and Crunchie – a Crunchie drip cake!
The Crunchie showstopper
So I’m always fan of producing ‘showstopper’ type recipes, because I just think they look amazing. They’re something you could produce for a birthday, a party, or just any form of celebration… and drip cakes are perfect for this. They just always look amazing, and everybody loves them. Something about them makes them a lot more showstopper than a regular cake.
This Crunchie drip cake might genuinely be one of my boldest yet. Layers of rich chocolate cake, honey buttercream, chocolate drips, Crunchie spread (if you can find it in the shops) and so many Crunchie pieces make it completely over the top in the best possible way. It has crunch, softness, sweetness, and that unmistakable honeycomb flavour running all the way through.
Honeycomb Crunchie recipes
My honeycomb and Crunchie recipes are some of the most loved bakes on my entire blog, and I totally get why. That combination of chocolate and honeycomb is just irresistible. So many of you make the honeycomb Crunchie cupcakes and the honeycomb Crunchie cake on repeat, and I’ve had endless messages asking for an even more epic version… so here we are.
This recipe keeps the same flavour pairing chocolate sponge and honey buttercream because there’s no point messing with something that already works beautifully. The balance is spot on, and scaling it up into a three-layer drip cake just makes it even more indulgent.
Crunchie chocolate sponge
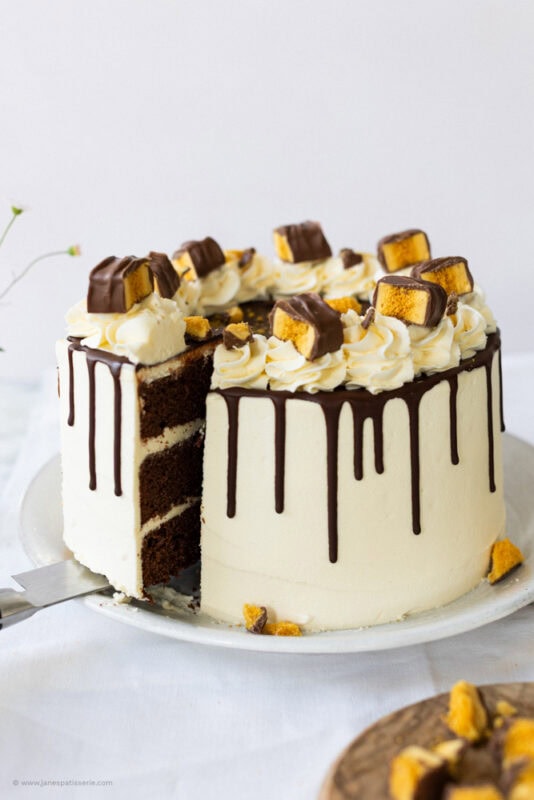
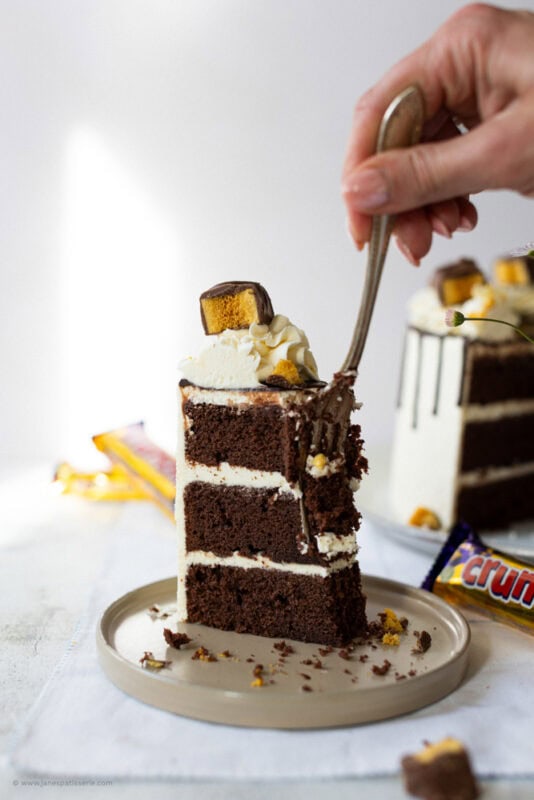
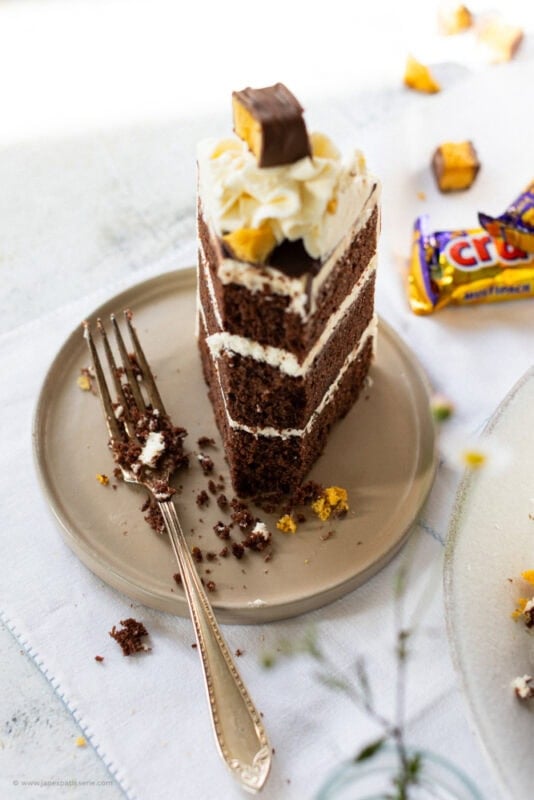
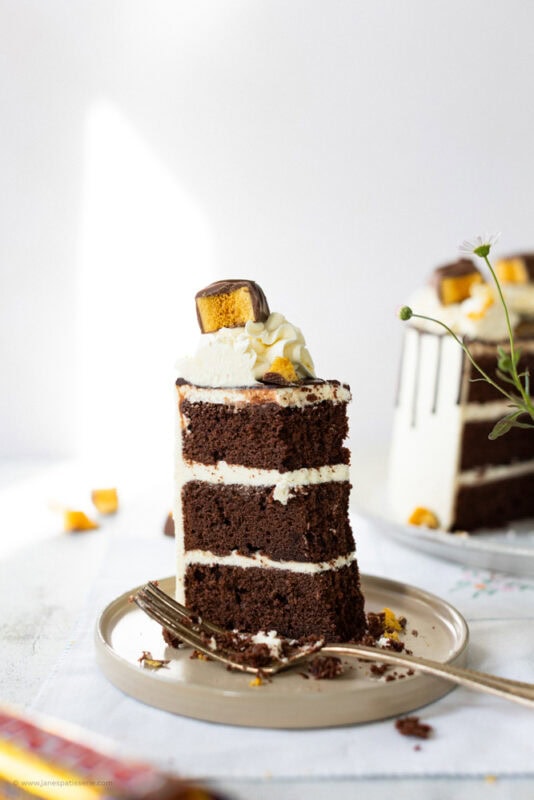
When you slice into this cake, you get three generous layers of fudgey chocolate sponge, honey buttercream frosting, and Crunchie. Every bite gives you a bit of everything, which is exactly what you want from a celebration cake. There’s no dry sponge here and no uneven layers, it’s rich, soft, and completely satisfying.
This sponge is ever so slightly different to a classic Victoria-style chocolate cake. I increased the dry ingredients slightly, which gives it a more fudge-like, almost Madeira-style texture. That makes it sturdier, easier to decorate, and much better suited to holding multiple layers and a drip.
I did this intentionally because drip cakes need a sponge that can handle a bit of weight. If you’d prefer a softer sponge, you absolutely can swap to 330g self-raising flour and 70g cocoa powder to make up the 400g total. I’ve tested both ways, and while both taste great, this version is my go-to for stacked cakes.
Buttercream
The honey buttercream frosting is something I randomly made when I was developing the other recipes, and its just wonderful. Oddly, I find it makes the frosting slightly less sweet, but still incredibly delicious. For this particular one, I had to use less honey for the this buttercream in comparison to the others, as it needs to hold better.
When making a drip cake you need the buttercream to be stiffer in comparison to a regular cake, because it needs to withstand being sideways. Therefore, I used 100g of clear honey in this buttercream, but more sugar and butter in comparison to my honeycomb Crunchie cake. You can of course leave the honey out completely. If its a really hot summers day like its been recently, this might be an idea.
If the weather is really hot, then you don’t really want to add any extra liquid to buttercream if you can help it. The room temperature butter, and the icing sugar, is all you want. However, if the taste of the honey is amazing…. so its up to you. When I made this, I did use the honey, and it worked wonderfully. If you seem to struggle with buttercream being stiff in general, you might want to check the ingredients you are using.
Butter
I get SO many messages and questions about buttercream issues… Usually I use supermarket own UNSALTED BUTTER. Never use baking spread for buttercream. They are far too soft, and will result in a softer buttercream. Actual unsalted butter is the only way to go in my opinion.
The other issue that many seem to face is not having room temperature butter before making the buttercream… try not to heat the butter to get it to this either as that can mess with the butter and often makes the buttercream too loose for frosting. If your buttercream ever feels too soft, don’t panic. Pop it in the fridge for 10–15 minutes, then re-beat. I’ve had days where I’ve had to do this more than once it happens to everyone.
Drip cake similarities
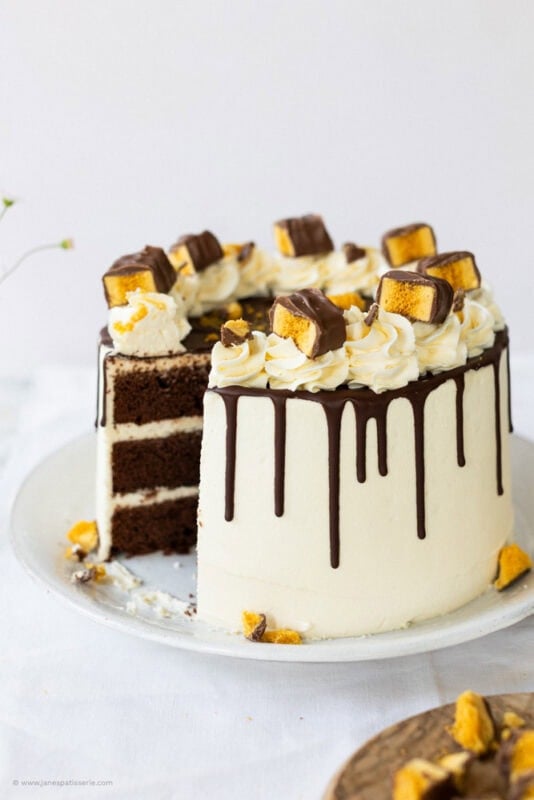
If you’ve made my Oreo drip cake, you’ll notice this one is styled slightly differently. In that recipe, I dripped around the edges and covered the top, but because Crunchie spread exists (the greatest invention ever), I wanted it to shine on this cake.
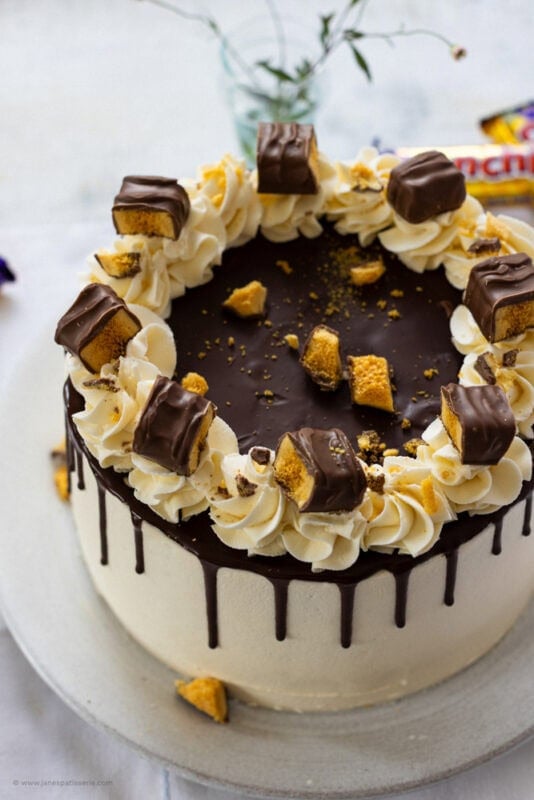
Using Crunchie spread as both a filling and a topping adds extra texture and flavour throughout the cake. It also gives the finished cake a glossy, golden look that feels slightly rustic but incredibly tempting. Once finished, this cake looks rich, indulgent, and borderline dangerous. The kind of cake people hover around waiting to cut, which, in my experience, is always a good sign.
Tips and tricks
- You obviously don’t have to make straight edged buttercream if you don’t want to, but I just like the look of it! You can slather it on, and it’ll still taste damn delicious.
- However, if you do want to make it like this, I seriously recommend using a metal scraper for the decoration of the buttercream, and the disposable piping bags… I wouldn’t be anywhere without them!
- Using higher quality chocolate with higher cocoa percentage will create a stronger buttercream as lower percentage chocolates will be more runny and require less oil or cream.
- All of the decorations are completely optional – but I love this style of cake! To make a smaller version of the cake, use:
- Two 8″cake tins
- 300g butter
- 300g sugar
- 255g flour
- 65g cocoa powder
- 6 medium eggs
- And it might take an extra 5-10 minutes to bake and use 2/3 of the decoration recipes!
- This cake will last in an airtight container/cake box for 3 days!
Crunchie Drip Cake!
Ingredients
Cake
- 400 g unsalted butter
- 400 g light brown sugar
- 8 medium eggs
- 350 g self raising flour
- 75 g cocoa powder
Buttercream Ingredients
- 350 g unsalted butter (room temperature)
- 700 g icing sugar
- 100 g clear honey
Decoration
- 1 Jar Crunchie spread
- 100 g dark chocolate
- 2 tsp sunflower oil
- 5-6 Crunchie bars
Instructions
For the Cake
- Heat the oven to 180ºc/160ºc Fan and line three 20cm/8inch cake tins with baking parchment – leave to the side.
- In a stand mixer, beat together the butter and light brown sugar until light and fluffy. Add in the flour, cocoa powder and eggs and beat again briefly till combined – try not to over beat the mixture!
- Divide the mixture between the three tins and smooth it over – bake for 25-30 minutes until a skewer comes out clean when poked, and when the cake springs back.
- Once baked, leave the cake to cool in the tin for 10 minutes, and then remove and leave to cool fully on a wire rack. If the cake has domed slightly, leave the cake to cool upside down to flatten it slightly.
For the Buttercream
- In a stand mixer, beat the room temperature butter with an electric mixer until it is smooth and loose and then beat in the icing sugar 1/3 at a time until its fully combined. Keep beating the buttercream for a few minutes so it starts to get fluffier and lighter.
- Add in the honey and beat again until combined.
For the Decoration
- Once the cakes are cooled, put the first layer on the serving plate - spread one or tablespoons of the buttercream onto the top of the first layer, and spread over a tablespoon of the Crunchie spread.
- Add the second cake on top, and then top again with some of buttercream and Crunchie spread, and then add the final sponge layer.
- Spread a thin layer or the buttercream around the edges of the cake to fill in any gaps and form a 'crumb coat'. Leave this to set in the fridge for 10 minutes, or on the side for 30 minutes until the buttercream crusts over.
- After its crusted a bit, spread the rest of the buttercream around the edges and top. Naturally you will wipe some off again with making the edges smooth, and this is what you will use to pipe on top later.
- I use a large metal scraper to do the smoothing. It's easier to roughly spread some around all the edges of the cake, and then smooth it all.
- Once finished, melt the dark chocolate in a heat proof bowl until melted. Add in 1/2 tbsp of oil and beat till smooth. Using disposable piping bags, pipe it round the edge of the cake, edging over slight bits to create the drip.
- Leave it to set for about 10 minutes, and then add some more crunchie spread on top. Alternatively, add the Crunchie spread on the top first, and then drip around the edges. I only used the drips around the edge in this cake, and didn't cover the top because of the Crunchie Spread.
- Leave the chocolate/spread to set for about 10 minutes or so, and then pipe the rest of the buttercream on top, and add on some crunchie pieces, and chopped up sprinkles of crunchie to finish.
- Enjoy! X
Notes
- You obviously don’t have to make straight edged buttercream if you don’t want to, but I just like the look of it! You can slather it on, and it’ll still taste damn delicious.
- However, if you do want to make it like this, I seriously recommend using a metal scraper for the decoration of the buttercream, and the disposable piping bags.. I wouldn’t be anywhere without them!
- Using higher quality chocolate with higher cocoa percentage will create a stronger buttercream as lower percentage chocolates will be more runny and require less oil or cream.
- All of the decorations are completely optional – but I love this style of cake! To make a smaller version of the cake, use:
- Two 8″cake tins
- 300g butter
- 300g sugar
- 255g flour
- 65g cocoa powder
- 6 medium eggs
- And it might take an extra 5-10 minutes to bake and use 2/3 of the decoration recipes!
- This cake will last in an airtight container/cake box for 3 days!
I made this for my partners 42nd birthday cake. I had to buy the Crunchie spread from Amazon, and a little expensive, but worth it! The crunch it adds to the cake is amazing!
I adjusted quantity to make 3 x 6inch sponges. I couldn’t find crunchie spread so used dairy milk spread and sprinkled with some chocolate honeycomb I bought off Amazon.
Delicious 5/5 as per for your recipes!! x
Hi Katie,
I’m wanting to adjust this one to make 3 x 6-inch sponges too. Could I ask how you did that? I was thinking of just using 2/3 of the quantities.
Hi Jane I watched your video on this yummy cake and wanted to ask two questions. Do you use stork or butter abs also what attachment would I use in my new Kenwood stand mixer. Thank you in advance 🥰
For the sponges I use stork, for the buttercream I use block unsalted butter! And the beater/K attachment!
me and my dad made this for my brothers 17th birthday and it was amazing i also really enjoyed making the mars bar brownies and i’ve never been anywhere different to find brownie recipes this website/blog is amazing for good and yummy recipes love all the work you’re putting in x
Hi Jane,
Just wondering if you know where to get a tall cake carrier? I often need to bring these cakes to a different house but the 3 layer ones are too tall to fit in the cake box, and cannot seem to find a larger one.
Thank you
Some cake boxes are taller (it depends where you buy them from sometimes I find) but I only have one tall plastic box I bought about 5 years ago and I’ve never found it online since unfortunately!
Hi! Love all your recipes 🙂 I’m wanting to make this sort of cake but with Nutella and Ferraro Roche’s! Do you have an idea on what I should use/amounts of ingredients for the buttercream?
Thank you! Nutella can make the frosting softer compared to the honey, but it should still work – so maybe just straight swap? x
Thank you! So maybe just 100g of Nutella? X
Yeah! x
Hi, followed the recipe to the letter but my sponge was heavy and dense. Any advice for next time to improve this?
That’s really strange – it’s a simple chocolate Victoria sponge so it shouldn’t be at all. How did you mix it? There could have been too much egg for example.
Brilliant!! I made this for my parents anniversary, and it was gorgeous, it looked the part and I was very impressed as I had never made a multi layered cake and this looked outstanding. It lasted for about 5 days for us, and we served it to quite a lot of people (we cut on the outside of each crunchie piece and halved the slice as 1 is to big ha ha). If you are going to make this make it- DELICIOUS
Thank you Jane