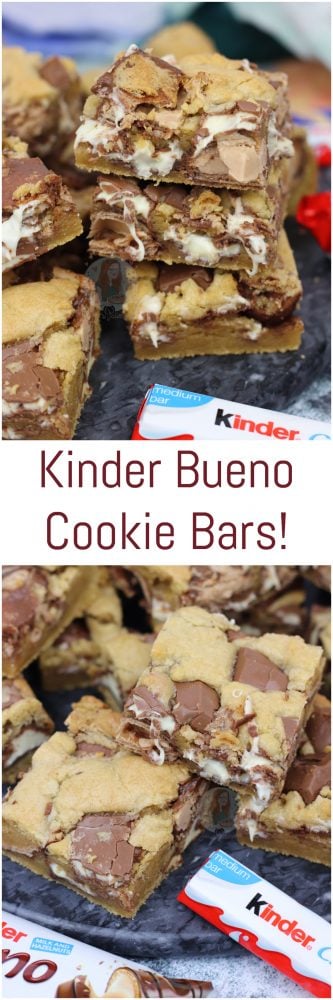
Kinder Bueno Cookie Bars!

*This post may contain affiliate links. Please see my disclosure for more details!*
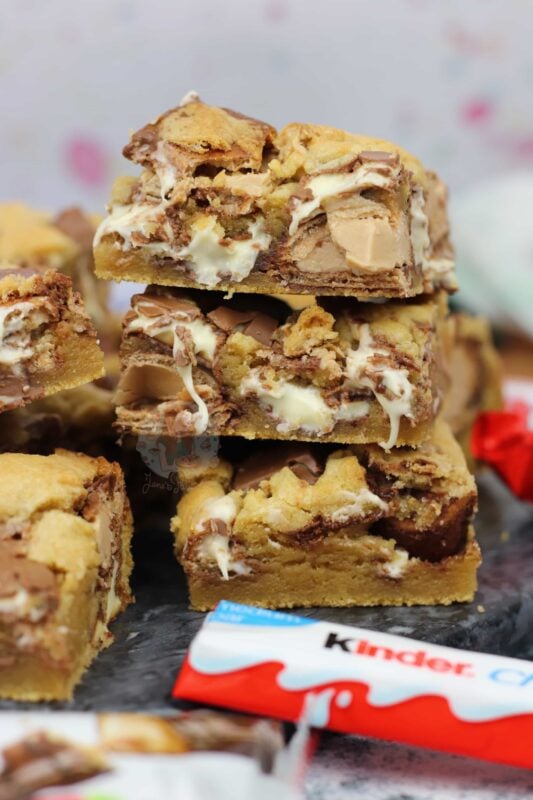
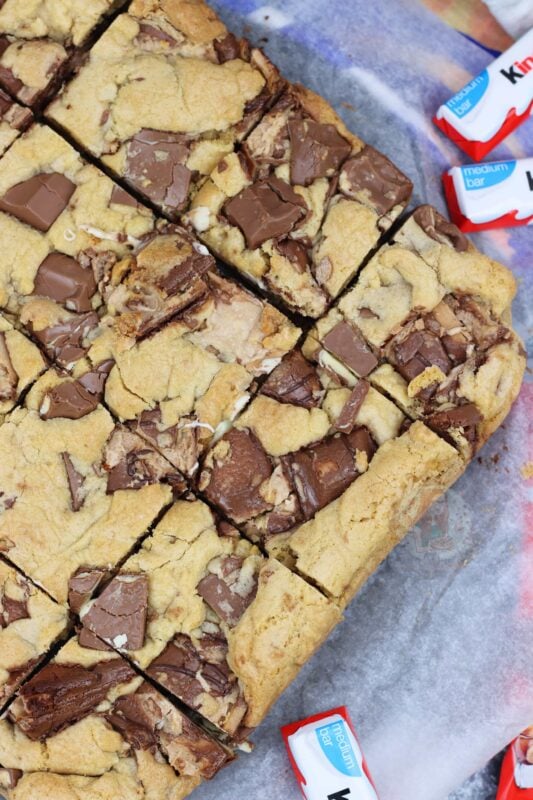
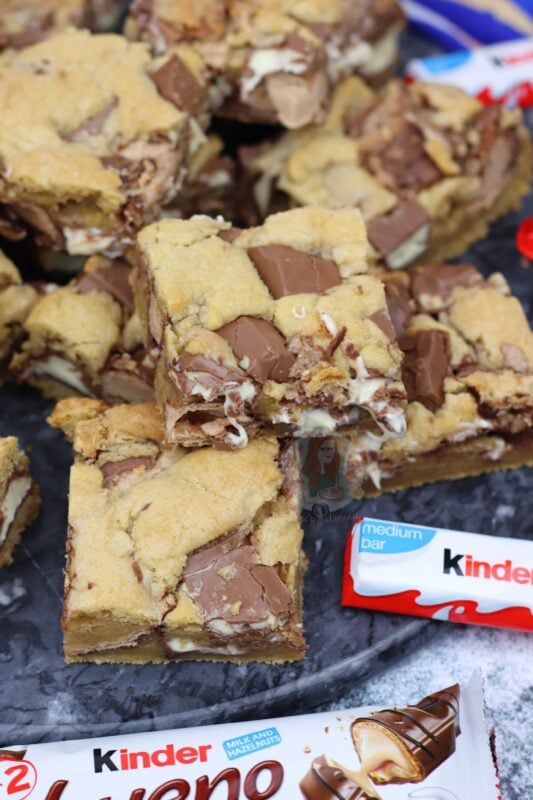
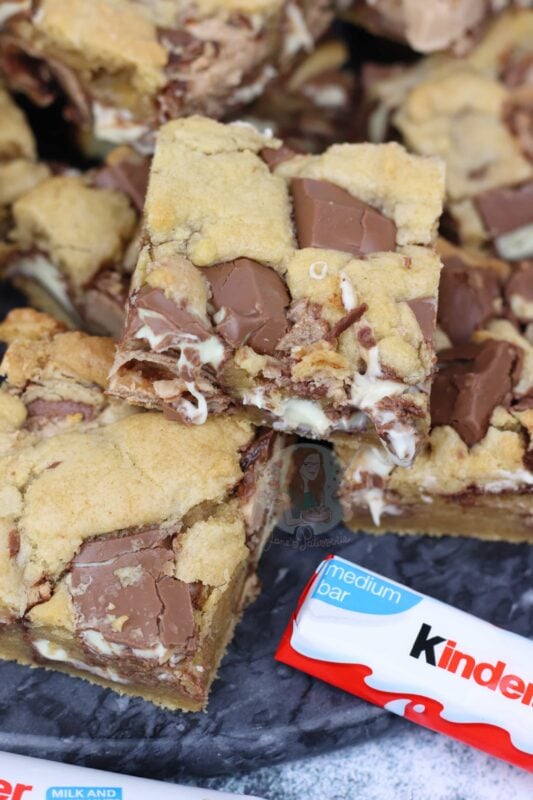
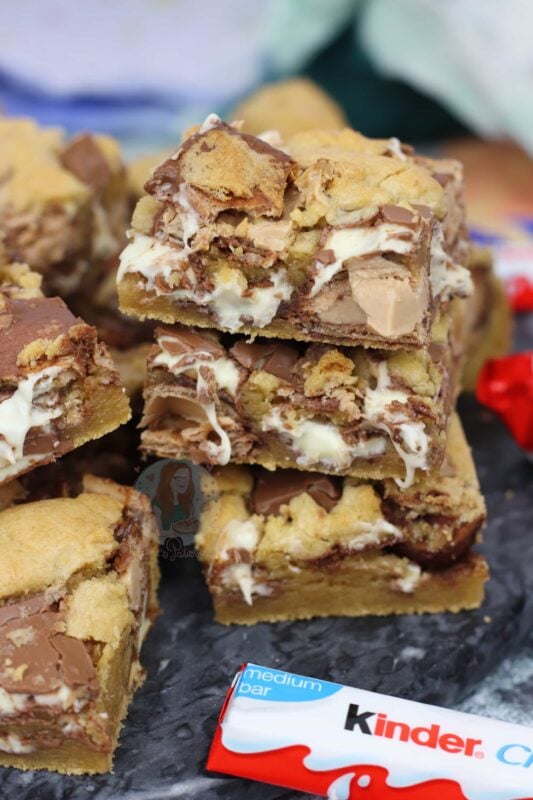
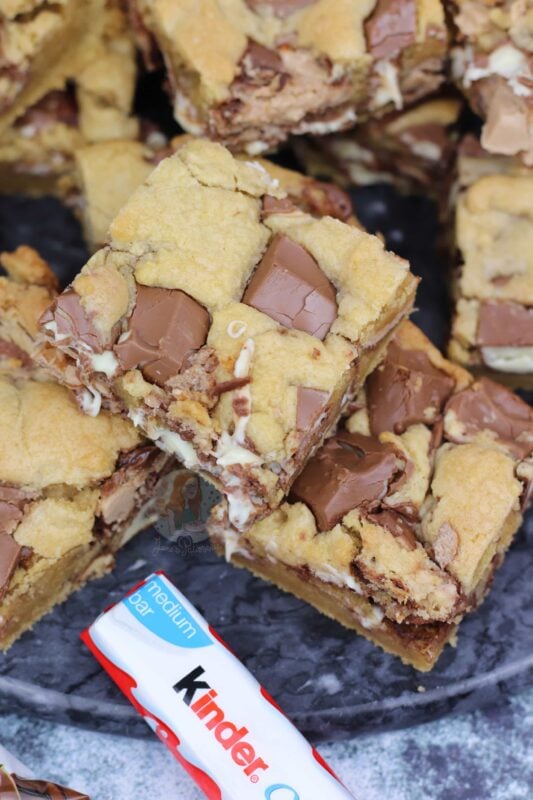
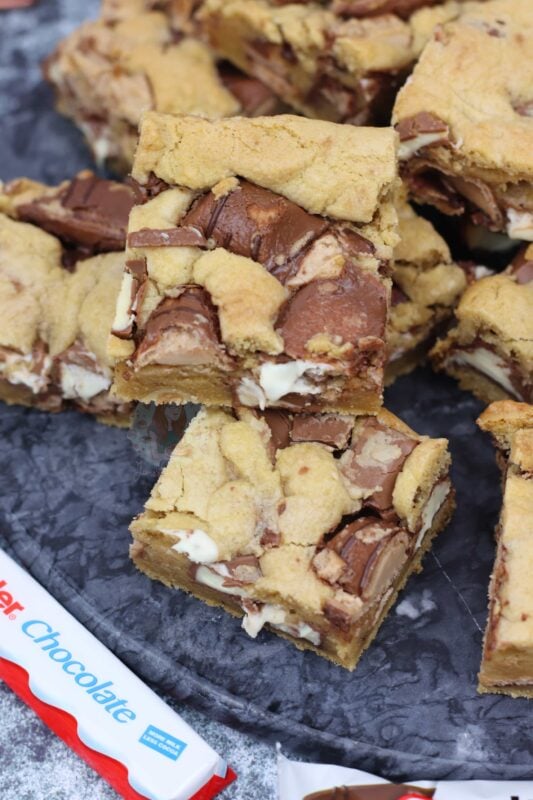
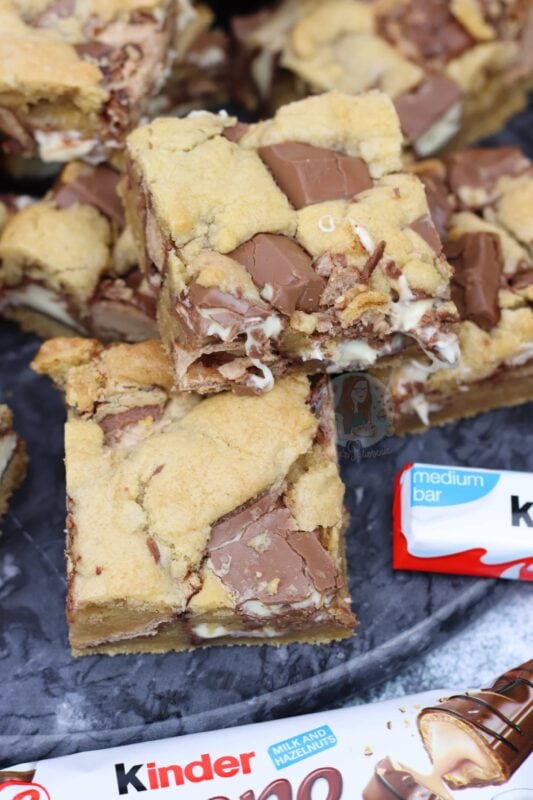
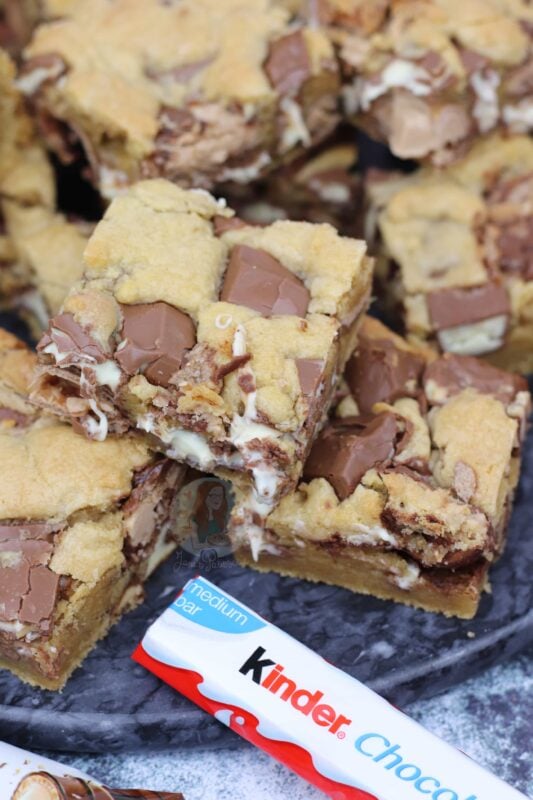
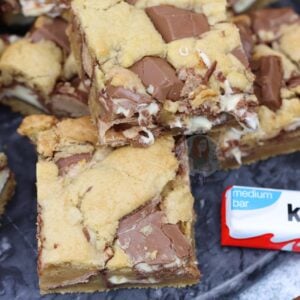
Gooey, delicious Kinder Bueno cookie bars packed full with Kinder chocolate and Kinder Bueno pieces
Kinder Bueno bakes
Kinder Bueno recipes honestly take over my blog a little. They’re always popular, and people always want more. I’ve actually only got four Kinder Bueno related recipes on my blog so far, but they’re some of my most popular, especially my Kinder Bueno Cheesecake.
Because of how Kinder Bueno is an absolute kicker, I thought I should post another and I know you’ll love these. Cookie bars are always a hit as well, but Kinder Bueno Cookie Bars?! Utterly next level.
Kinder Bueno cookie bars
Packed full of Kinder Chocolate, and Kinder Bueno pieces, this is the sort of treat that people will ask for again and again without fail. If you don’t like Kinder chocolate, however, please see my many other cookie bar recipes I have available
- Flour – always use plain flour, you don’t want to use self raising. I also add cornflour to create a softer texture
- Raising agents – I only use bicarb in the cookie bars, you don’t want to use baking powder
- Salt – the best addition in my opinion. I use chunky sea salt, not table salt
- Butter – block butter or bakings spread works well
- Sugar – the standard cookie mix of light brown and also white granulated sugar
- Egg – one egg only, I use medium, but large will also work
- Vanilla – an added little bit of sweetness
Chocolate
So as this is a kinder bueno themed bake, I use the kinder chocolate and the kinder bueno bars. The kinder chocolate is best for the softer more chocolate chunk style part, and the kinder bueno is just kinder bueno with that iconic wafer filling.
Folding through the Kinder Chocolate is easy as its solid, but folding in the Kinder Bueno isn’t as easy because they’re quite a bit more fragile. If you’re worried, I did it a couple of times where I put the Kinder Chocolate pieces into the cookie dough first, and then the Bueno so it wasn’t quite as solid as just the dough on its own. It’s not the end of the world if they Kinder Bueno pieces break up, but if you do it by hand it’ll be a lot safer than using a mixer for this bit
Adapting the bake
If you wanted to make these into a chocolate cookie dough, rather than a ‘plain’ one, you can add in 25g of cocoa powder, but take out 50g of the plain flour. The cocoa powder dries the cookie dough out more in comparison to the flour, so you’d have a smidge less dry ingredients.
I do have Kinder Bueno cookies on my blog which are always worth a try because, yet again with Kinder, HEAVEN! Also, Kinder lovers rejoice for my other Kinder Bueno recipes such as ice cream, blondies, a cookie pie or a Kinder tart – absolutely yes please, get me a plate now!
Tips & Tricks
If you’re not careful, the chocolate that is on top or sticks out of the cookie bars can burn slightly, but if your oven is the correct temperature it should be fine. If it’s catching, you need to lower the temperature of your oven.
- These cookie bars will last for 4-5+ days at room temperature
- These will freeze for 3+ months
- You can switch to milk chocolate chips instead of kinder chocolate
- I use this 9″ square tin
I hope you love this recipe as much as I did! Enjoy! x
Kinder Bueno Cookie Bars!
Ingredients
- 275 g plain flour
- 1 tsp bicarbonate of soda
- 1/2 tsp salt
- 1 tbsp cornflour
- 115 g unsalted butter
- 55 g granulated sugar
- 135 g light brown sugar
- 1 medium egg
- 1 tsp vanilla
- 250 g Kinder chocolate (chopped)
- 170-250 g Kinder Bueno bars (chopped)
Instructions
- Preheat your oven to 190ºc/170ºc fan, and line a 9x9 inch square tin with parchment paper, and leave to the side for now.
- Whisk together the plain flour, bicarbonate of soda, salt and cornflour together in a bowl and leave to the side for now.
- Melt the unsalted butter until liquid, and add to a bowl. Add in the light brown sugar and granulated sugar and whisk the mixture together for two minutes by an electric whisk, 3 minutes by hand.
- Add in the egg and vanilla and whisk again until they're combined.
- Add in the mixed together dry ingredients and mix until a really thick cookie dough is formed.
- Add in the chopped Kinder chocolate, and chopped Kinder Bueno, and fold through. Reserve some of the Kinder chocolate for the top of the cookie bars.
- Push the mixture into the 9x9 inch tin, and add on the last few bits of Kinder goodness.
- Bake the cookie bars in the oven for 17-22 minutes. I usually do 19 minutes so they stay reasonably gooey.
- Once baked, leave in the tin for 10 minutes to cool a bit, and then remove and cool fully on the wire rack. Enjoy!
Notes
- If you're not careful, the chocolate that is on top or sticks out of the cookie bars can burn slightly, but if your oven is the correct temperature it should be fine. If it's catching, you need to lower the temperature of your oven.
- I use this 9" square tin
- You can switch to milk chocolate chips instead of kinder chocolate
- These will freeze for 3+ months
- These cookie bars will last for 4-5+ days at room temperature
Find my other recipes on my Recipes Page!
You can find me on:
Instagram
Facebook
Pinterest
Twitter
Youtube
J x
© Jane’s Patisserie. All images & content are copyright protected. Do not use my images without prior permission. If you want to republish this recipe, please re-write the recipe in your own words and credit me, or link back to this post for the recipe.
I made these last night and they were amazing!
Hi Jane,
So I did this recipe earlier today but my tin was slightly smaller than you recommended so it was a little undercooked (still edible mind😁). Is this because I used a smaller tin?
I did put them in for a bit longer and covered them in foil towards the end but when cutting them some bits looked a little raw.
They do taste amazing though! Xx
Yes it will be – the volume difference between tins can vary greatly so it will take longer to bake!
Hi
I baked these exactly as your recipe states and like your other recipes I’ve tried, they turned out bloody delicious. Do you have any tips on being able to cut them into neat squares please? Mine cut super roughly around the edges. Would love for them to look sharp like yours
I use a large sharp knife – for example the tray is 9″ square, and I use a 10″ knife so it cuts straight down!
I’ve made these for my best friends engagement party and they’re so good! Do o store leftovers in the fridge? Thanks!! Xx
Ahh yay! And no, just room temp! X
Hi, I love your recipes! Was just wondering if you wanted to change the chocolate you add, how much should you add? So if I wanted to change the beuno to a different chocolate, would I add the same amount?
I typically recommend maximum 400g of added chocolate total – (as most others also have 100g chocolate chips for example). And it can vary depending on what you add as fillings of chocolates can differ!! x
I’m struggling to find brown sugar, could I add extra granulated instead? Thank you 😊
Yes! Use all granulated x
Hi Jane, made these before SO YUMMYYYY😋
Just wondering when you freeze them do you freeze the dough or when they’re baked? Xx
Hey! Ahh yay! And you can do either! x
How long can you freeze them for?
Not the cookies just the cookie dough? Also I’ve made these before and they were so good I do them often and change the chocolates!
I usually say raw cookie dough is safe up to three months in the freezer! So glad you like them!
Thankyou jane!
Hi! Could I use a 9 inch circular baking tin for this to make a cookie cake?
Hiya – you can, but the volume is slightly different so may take a smidge longer to bake!
I absolutely love this recipe if I wanted to use a slightly bigger tin how much more ingredients should I add?
Thanks
Ah yay! And that depends.. what size tin would it be?
Hi!
I really want to make these but in the UK it seems quite hard to get hold of cornflour, is there anything this can be substituted for? Or can I leave it out?
Thanks!
Oh how annoying for you, all my local asda/sainsburys have had a good stock recently! The cornflour is designed to be there for the texture (it makes it better) but you can substitute for 25g flour (but the texture may be different!)
Hi,
I made these last week and they tasted delicious! I was planning on making for a friend for her birthday.
Can you tell me the best way to store it please to keep it fresh? Would it be ok in a cardboard pizza like box for a couple of days?
Hey! So generally I store something like this in probably something a little more sealed like a tin or plastic tub! x
Hi Jane 🙂 I’m using a bigger tray 12 x 8” I’ve worked out the amount of ingredients I would need but do I need to change the temp of the oven and how long I bake it for?
Thank you 🙂
The temp should be the same – timings will increase but not too much longer, maybe 4-5 minutes?
I’ve just baked these for my friends birthday and they look and smell amazinggg! I was wondering, would these be okay to freeze? I want to keep a few for myself but don’t want to eat them right now xx
Hey!! Yes you can freeze them!! Xx
Hi,
Would you freeze after baking or freeze the dough?
Hey, you can do either!x
I have just made these after a long day at work! So easy, quick and delicious. I was slightly hasty and cut them whilst they were warm, I think I should have waited until they were completely cool. There goes my diet out the window, but it is worth it. I will be making your Lemon Loaf Cake next!
Honestly so delicious!!!
I did everything as per the instructions, however mine haven’t turned out like that. The dough was crumbly?
The dough is quite dry as shown in the video – you just need to push it down and it’ll be fine!