Cookies and Cream Cake!

*This post may contain affiliate links. Please see my disclosure for more details!*
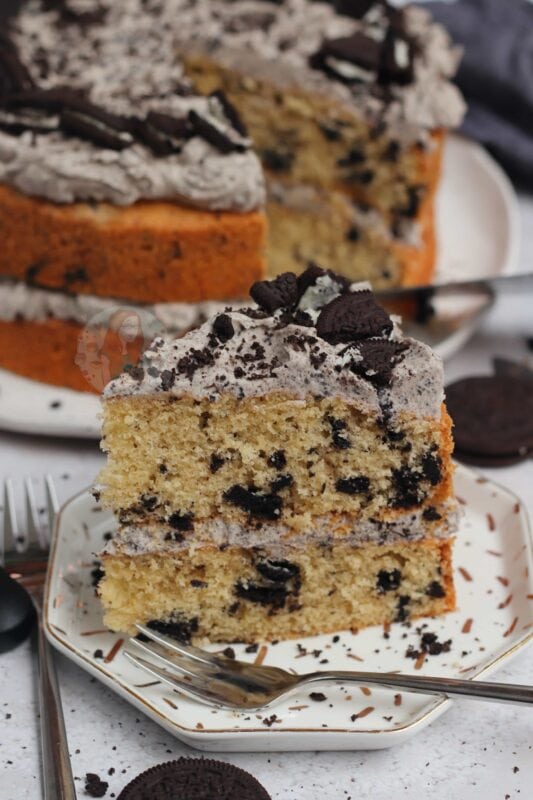
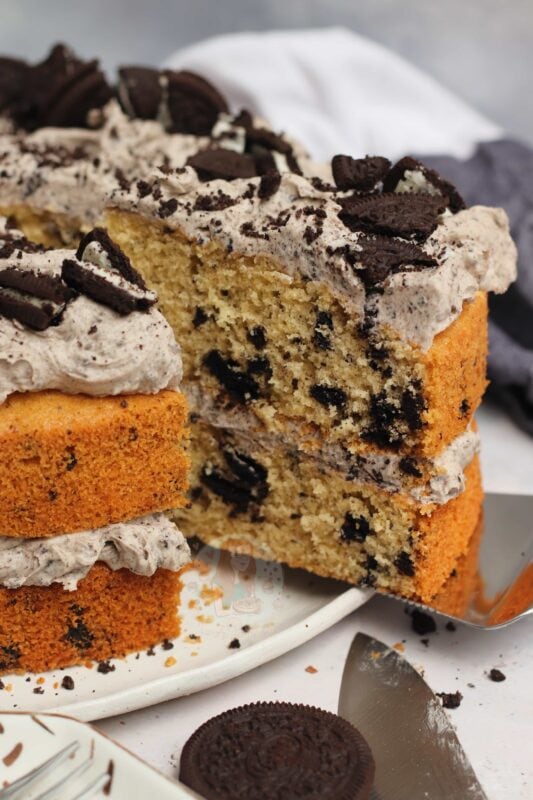
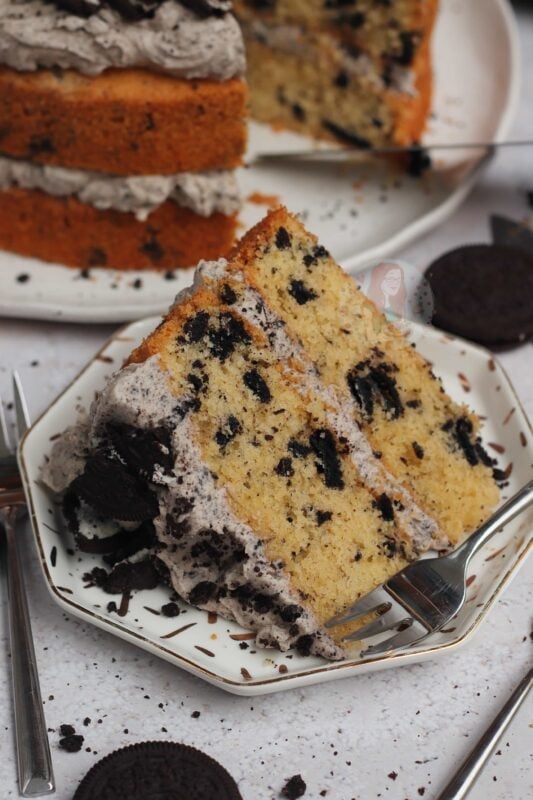
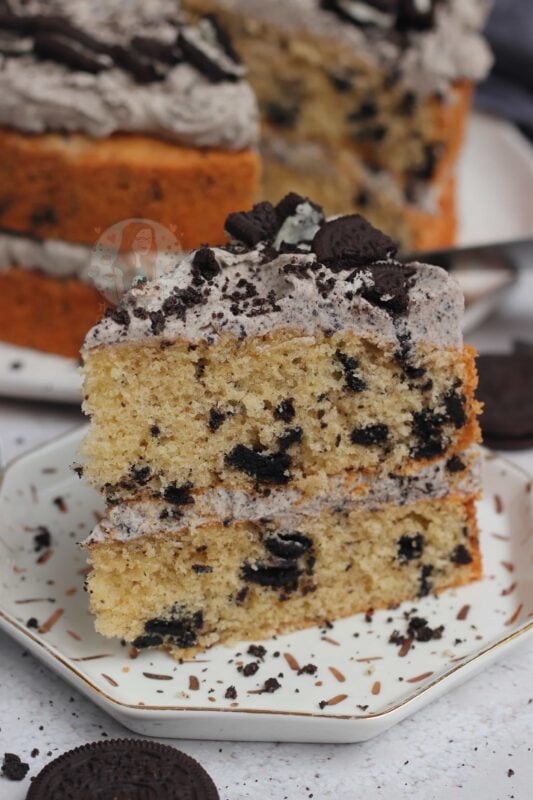
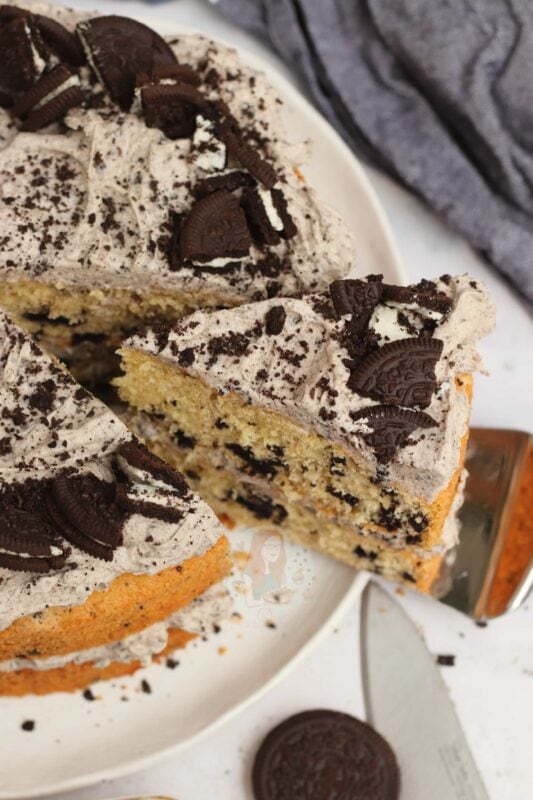
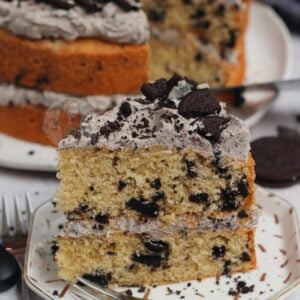
A delicious two-layer cookies and cream cake with a cookies & cream sponge, and cookies & cream oreo buttercream frosting!
Cookies and cream cake
So! As you all may or may not know, I do have a few oreo/cookies and cream related cakes already on my blog… my oreo drip cake has been on my blog for years, and it has always been a hit! I also posted my oreo chocolate cake last year, but I wanted to do something that was oreo, but not chocolate related!
I decided to call this one a ‘cookies and cream cake’ rather than oreo because I just think it suits the cake more! They are obviously oreos that I use, but you can use anything really – you can use the knock off versions, or even go for an entirely different biscuit!
The last two-layer cake I posted on here was in January with my vegan Victoria sponge and it was delicious, but I had a special request for a cookies and cream cake so I thought I would post it sooner rather than later!!
Sponge
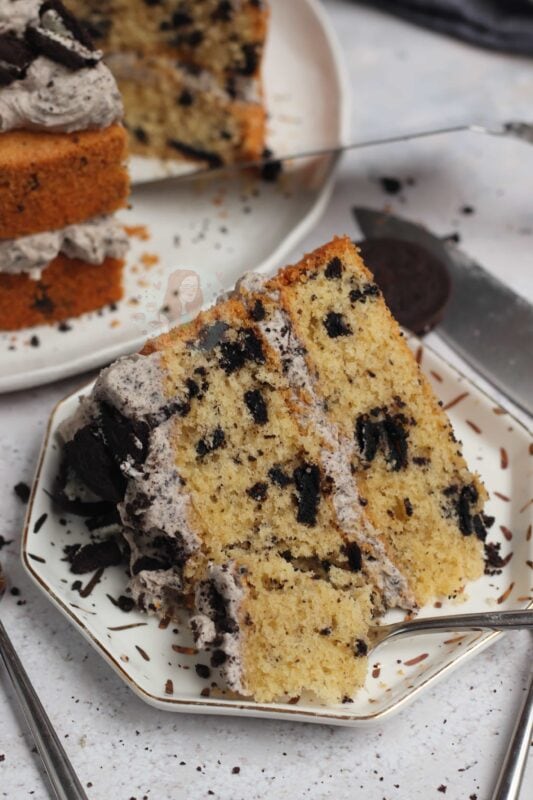
For the sponge, it’s just a basic vanilla sponge with a packet of crushed biscuits in. I tried a few different versions of the sponge – adding in other ingredients, using this and that… but honestly this was just so much easier and better.
All you do is chop/crush the biscuits so that they are still relatively large (I basically chop them into quarters or slightly smaller) and fold through the cake mix! I use stork spread for the cake mix, along with caster sugar (to keep the mix a lighter colour), self-raising flour, and the eggs. I then also add in a little vanilla, but this is optional!
I split the mixture between the two tins, and bake till a skewer comes out clean and also the cake stops making a bubbling/crackling sound. This is a good tip for if you’re not sure when cakes are done or not – carefully lift the tin to your ear, and if it’s still making the sound, it needs a bit longer!
Buttercream
When it comes to the buttercream – I recommend using actual unsalted butter over a baking spread. Actual butter is a lot firmer once the icing sugar and the rest is mixed in, and it makes it much better for when the weather is hot especially!! I use any unsalted block butter from any supermarket if that helps – but branded block butter also works.
For the cookies and cream buttercream frosting, you want to make sure they are a really fine crumb – especially if you want to pipe the buttercream. I just slathered it on this time as you can see – but the biscuit crumbs can easily clog up a piping tip. I don’t remove the creme middle of the Oreo as you just don’t need to – and I like the flavour! I use my food processor for this bit, but you can use a bowl with a rolling pin, pestle and mortar, sandwich bag with a rolling pin and so on!
Decoration
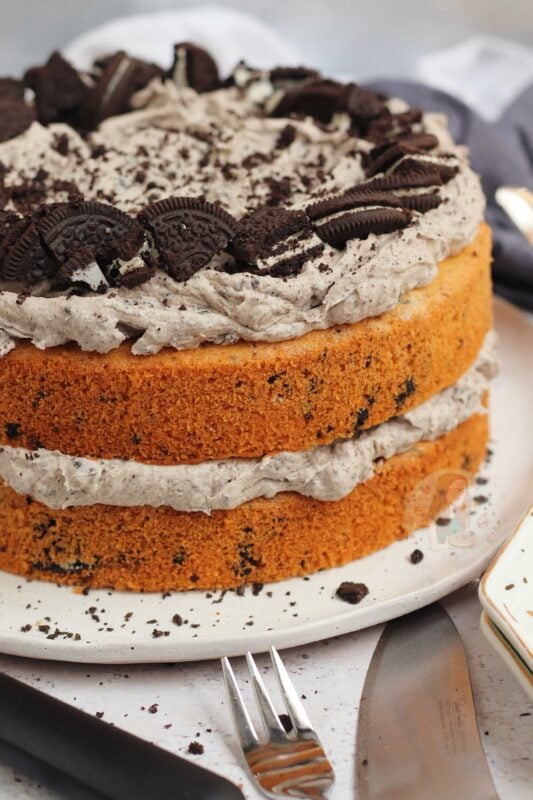
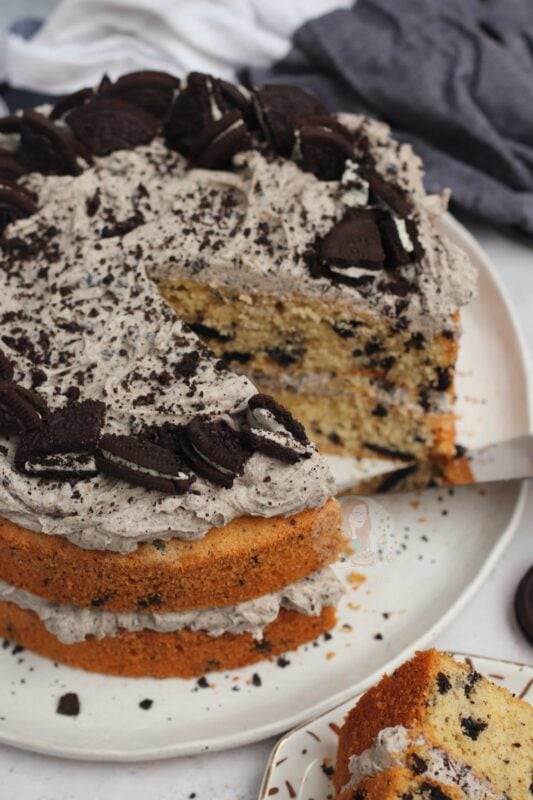
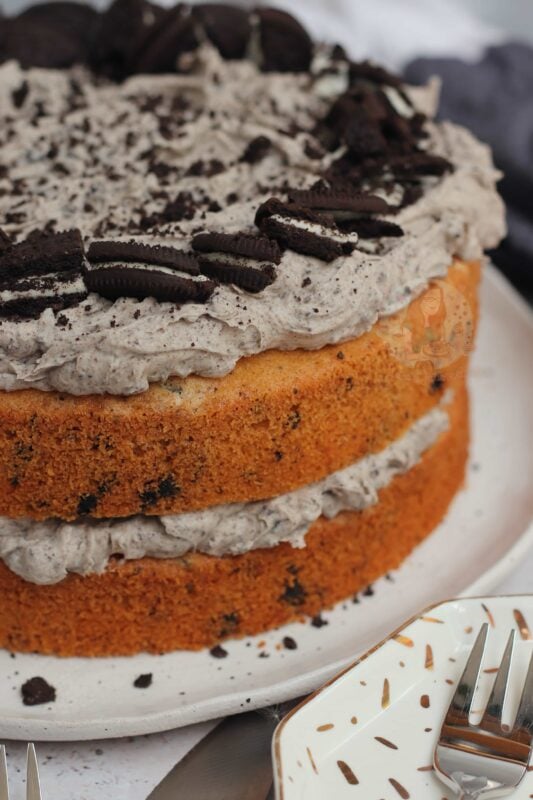
You can pipe the buttercream with any tip – but I recommend using a round tip, or a larger swirl type tip such as a 1M – my usual favourite 2D closed star may clog more easily! Of course, you can just slather the frosting on as well like I have.
For the topping, I just add on a few extra oreos for the decor, with a few more crumbs – and it’s amazing because it’s so simple and it just works the simplicity is the key to this cake.
Three layer version
If you want to make a three-layer cake for this to make it more ‘showy’ and better for a birthday – you will want to use 400g of butter, sugar and flour, with 8 medium eggs – then use 250g of chopped Oreos in the sponges. Split that between three 8″ tins, and bake for 30-35 minutes. Use 1.5x the buttercream!
Also, if you want to switch it up slightly you could make a different version such as chocolate, or even check out my oreo drip cake for a drip cake version of the cake – there are so many options.
Tips & Tricks
- This cake will last for 3-4+ days at room temperature
- You can freeze this cake and/or the sponges for 3+ months
- You can use any flavour oreo you fancy
- To make the sponge chocolatey flavour you can remove 50g of self raising flour and add 50g of cocoa powder
- I use these 8″ cake tins in this recipe

Cookies and Cream Cake!
Ingredients
Cake
- 250 g unsalted butter
- 250 g caster sugar
- 250 g self raising flour
- 5 medium eggs
- 1 tsp vanilla extract (optional)
- 150 g chopped Oreos
Buttercream
- 125 g unsalted butter (room temp)
- 250 g icing sugar
- 8 Oreos crushed
Decoration
- Extra Oreos
- Oreo crumbs
Instructions
For the Cake
- Preheat your oven to 180C/160C Fan and line two 8"/20cm tins with parchment paper!
- Chop your Oreos into quarters or slighlty smaller - but still so there are chunks.
- Beat your butter and sugar together until light and fluffy. I use my stand mixer with the beater attachment!
- Add in your eggs, flour and vanilla and beat again till smooth!
- Finally, add in your oreos and just lightly fold through!
- Split the mixture between the two tins evenly, and then bake in the oven for about 28-35 minutes! I test my cakes with a skewer, but also for the sound of bubbling/crackling - if they still make the noise they need a bit longer baking!
- Let the cakes cool in the tins for 10 minutes, and then on a wire rack.
For the Buttercream
- Make sure your butter is at room temperature - I don't recommend using a spread for the buttercream, I use foiled block butter.
- Beat the butter on it's own for a few minutes to loosen it and make it lighter!
- Add in the icing sugar, and beat again for a few minutes - I use my stand mixer with the beater attachment again!
- Once it's smooth, add in your oreo crumbs - for this you want the oreos to be a fine crumb! I don't take the creme out of the Oreos.
For the Decoration
- Get your first cake onto your plate/board - spread half the buttercream on top!
- Add your second cake, and the second half of buttercream.
- Decorate with some chopped oreos and some more crumbs! Enjoy!
Notes
- If you want to make a three-layer cake for this to make it more 'showy' and better for a birthday - you will want to use 400g of butter, sugar and flour, with 8 medium eggs - then use 250g of chopped Oreos in the sponges. Split that between three 8" tins, and bake for 30-35 minutes. Use 1.5x the buttercream!!
- This cake will last for 3-4 days once baked!
- If you want to use large eggs, use four large eggs and use 240g of butter/sugar/flour!
- You can use any flavour oreo you like - or even the double stuffed! I just used the original!
ENJOY!
Find my other Recipes on my Recipes Page!
You can find me on:
Instagram
Facebook
Pinterest
Twitter
Youtube
J x
© Jane’s Patisserie. All images & content are copyright protected. Do not use my images without prior permission.
Most popular cake I’ve made! Made it a couple of times recently for friends and family and everyone’s been asking for the recipe and asking me to cook it again! I love the bubble noise tip, what a game changer, no more under or over cooked!
My cake came out very dry…we’ve had to eat it with ice cream! I think take it out of the oven while it’s still making the bubbling noise would be better than waiting for it to stop bubbling like the recipe says. Tasty and looks good though!
How did you store the cakes? If they were kept in the fridge that would dry them out, but yes it could also have been over baked x