Jane's Patisserie » Recipes » Best Baking Recipes » No-Bake Biscoff Cheesecake!
No-Bake Biscoff Cheesecake!

*This post may contain affiliate links. Please see my disclosure for more details!*
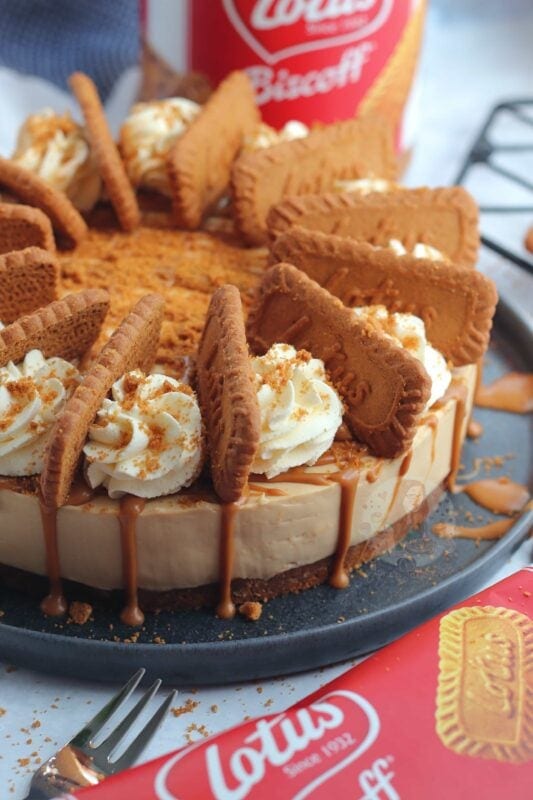
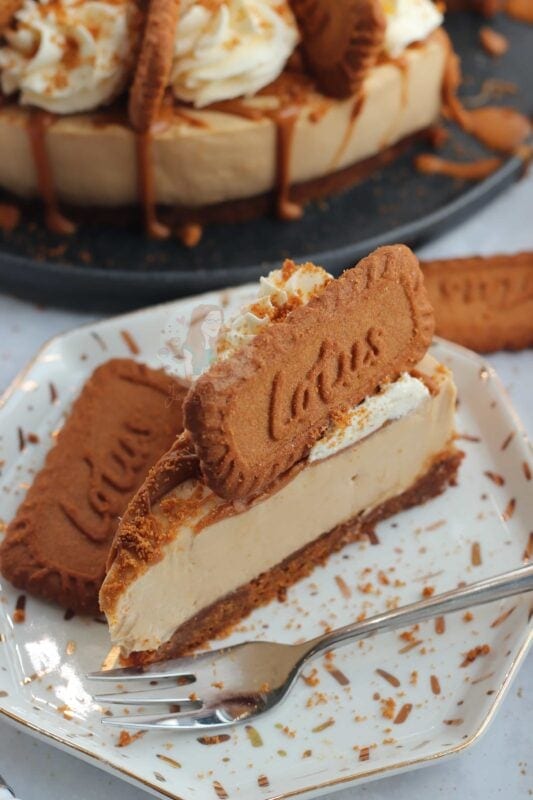
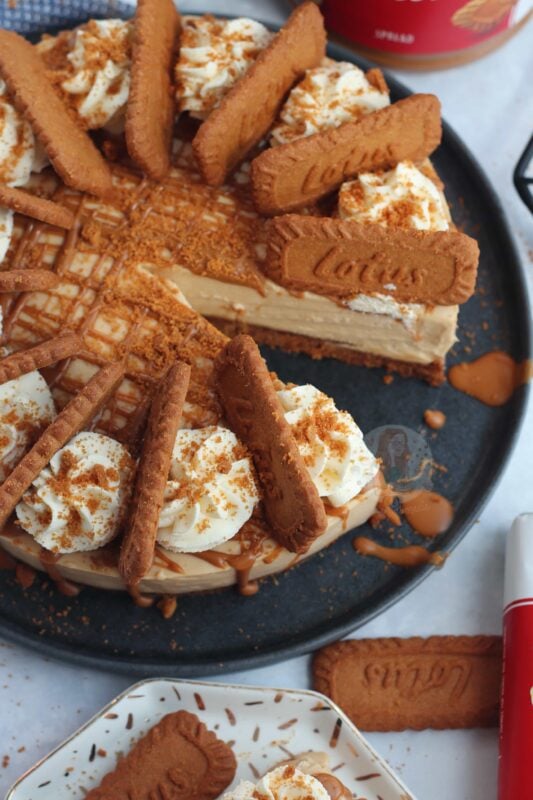
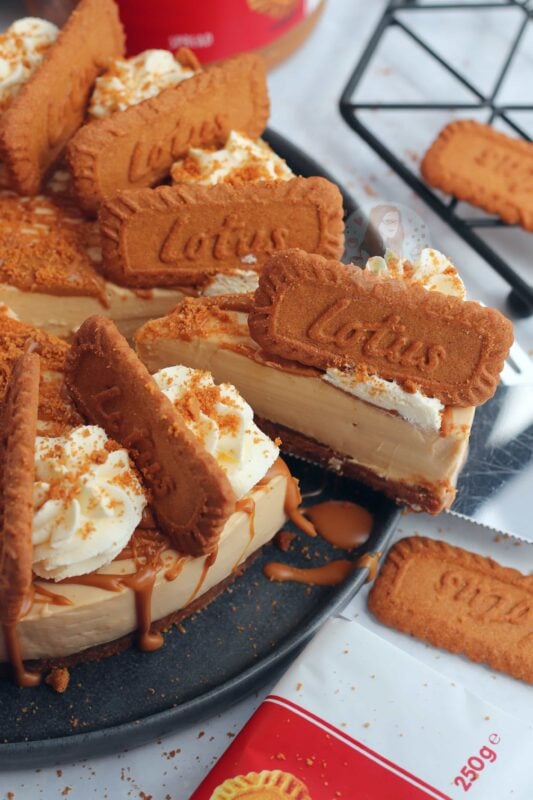
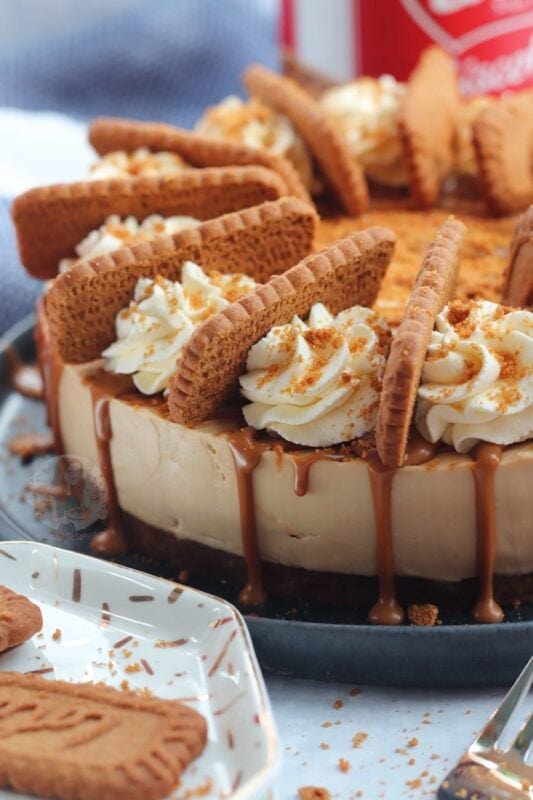
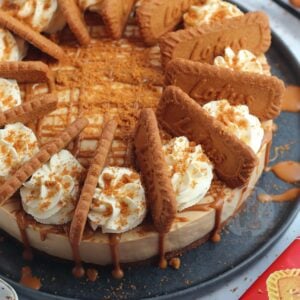
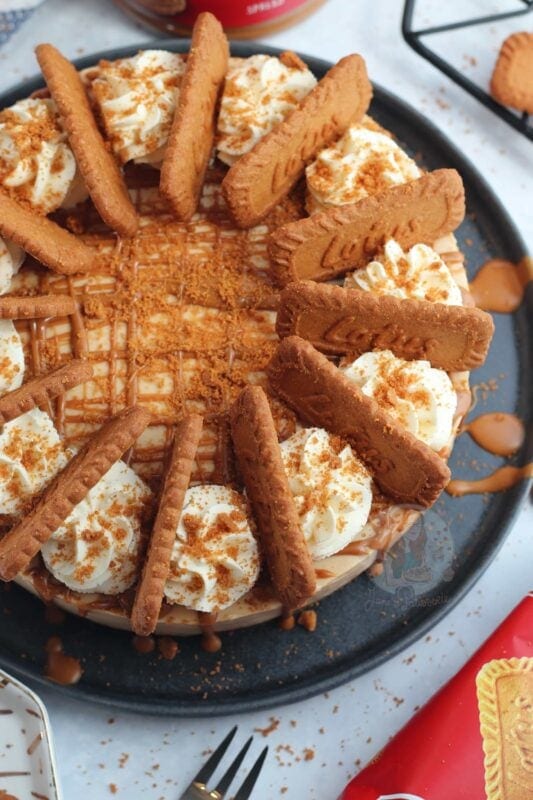
A no-bake biscoff cheesecake recipe with a lotus biscoff biscuit base, creamy biscoff cookie butter cheesecake topping, whipped cream swirl and biscoff drizzle…. With only a 10 minute prep time, and make ahead friendly, you can blitz, press, whisk, chill and slice.
What is Biscoff?
Biscoff (also called speculoos/speculaas) is a spiced caramelised biscuit, and biscoff is the spreadable cookie butter version made from those biscuits. Commonly found in supermarkets (I am based in the UK, but it is available in many other counties) near other spreads and jams, it’s a delicious and very versatile in baking.
If you can’t find Biscoff where you are, look for a speculoos cookie butter, or spiced biscuit spread, as it does come under various other names as well, depending on the brands.
Making a no-bake cheesecake
The full recipe and method can be found in the recipe card below
The lotus biscuit base
The simplicity of mixing the blitzed biscuits and melted butter to make the base, is incredibly simple, but you do still need to make sure that biscuits are blitzed very finely with no lumps, and to make sure to press it down very firmly into the tin so it doesn’t crumble.
I press mine into the base of an 8″ springform cake tin so that the cheesecake is easier to remove from the tin after setting. I do not line the base, but you can add a piece of parchment paper if you are worried.
The no-bake cheesecake filling
When you whisk the mix up, it really doesn’t take too long at all – it takes me about 45 seconds to make the mixture. This is, of course, dependant on a few things – the temperature of the ingredients, brand of ingredients etc.
- Cream cheese – pretty much ANY full-fat soft cheese works. I would drain any liquid you see on top. Mascarpone is naturally sweeter if you want to use that, and others such as Philadelphia are thick and classic cheesecake
- Cream – use double cream (I’m in the UK – elsewhere it can be called ‘heavy cream’). Our double cream is typically 47% fat content so is very high. If yours is less, you may want to whip the cream separately and then fold through to help it set better
- Sugar – I like to use icing sugar
- Biscoff – smooth, or crunchy – it’s up to you.
I switch between using my stand mixer and my electric hand whisk – but both work very well. You can use either, or neither. When you make a cheesecake without an electric mixer you just have to work a lot harder.
Optional toppings for a cheesecake
You don’t have to decorate a cheesecake like this at all, but you can try a variety of toppings. I generally like to stick to a drizzle of biscoff (as it’s the flavour theme), and some sweetened whipped cream drizzled on top.
If you are to whip your own cream, I would suggest a whipping cream/double cream, so that it sets firmly, using a squirty cream can won’t work as the cream deflates quite quickly. I use a 2d closed star piping tip for my whipped cream.
Tin sizes, scaling and options
The best tin to use for any cheesecake is an 8″ springform cake tin, which is at least a couple inches deep (so the deeper ones that you can buy). This is the tin I use for all of my cheesecakes for consistency in developing recipes.
If you wanted to make a smaller cheesecake, you can halve the recipe and use a 6″ tin – this could serve 6-8 people. If you wanted to increase the cheesecake serving, and use a 9″ tin, you can increase the recipe by about third.
I have a recipe in my third book, Jane’s Patisserie Everyday for mini biscoff cheesecakes, which serves 12 individual cheesecakes.
FAQs
Why hasn’t my cheesecake set?
The use of low fat ingredients, or under-whipping
Is there an alternative to Biscoff?
You can use any other brand of spiced biscuit spread that you want – or even switch to a different spread such as Nutella.
Can this cheesecake be frozen?
Yes! See more storage tips below the recipe card.
We don’t have double cream, what can I use?
Double cream is readily available in the UK. If you do not have it, you need to use the fattiest liquid cream you have, commonly called Heavy Cream in other countries.
My cheesecake has gone lumpy?
This means the mixture has split. You can try blending it until smooth, and then adding a setting agent such as gelatine to help it set. This usually occurs from over mixing.
No-Bake Biscoff Cheesecake recipe
A no-bake biscoff cheesecake recipe with a lotus biscoff biscuit base, creamy biscoff cookie butter cheesecake topping, whipped cream swirl and biscoff drizzle….
Print
Pin
Rate
Servings: 12 Slices
Ingredients
Biscuit Base
- 300 g Lotus/Biscoff biscuits
- 125 g unsalted butter (melted)
Cheesecake Filling
- 500 g cream cheese (full fat)
- 100 g icing sugar
- 250 g Biscoff spread (smooth/crunchy)
- 1 tsp vanilla extract
- 300 ml double cream
Optional Decorations
- 150 ml double cream
- 2 tbsp icing sugar
- 75 g Biscoff spread (melted)
- Biscoff biscuits
Instructions
- Blitz the biscuits for the base in a food processor until they're a fine crumb.
- Mix with the melted butter and press down firmly into an 8"/20cm deep springform tin.
- In a new bowl, mix the cream cheese, vanilla, icing sugar and Biscoff spread until smooth.
- Mix in the double cream and whisk until its thick and holds itself completely!
- (Don't whip it too fast, slow and steady wins the race). Alternatively, you can whip the cream separately to stiff peaks and fold through!
- Spread the mixture evenly over the biscuit base and chill in the fridge for at least 5-6 hours, but preferably overnight.
- Remove from the tin and decorate how you like.
- I whipped together the double cream and icing sugar and piped it on, adding a biscoff biscuit per slice and drizzled over some melted biscoff!
Video
Notes
- For this recipe you can use either mascarpone or soft cheese, both work perfectly. However, either MUST be full fat
- You might find it easier to melt the spread for 10 seconds before you try and decorate with it
- This cheesecake will last for 3 days in the fridge, once set.
- This cheesecake can be frozen for 3+ months
Recipe updated May 2017
I’ve updated this recipe quite few times, due to ingredient changes and to improve the overall recipe. The original recipe was:
- 150g of digestives
- 150g of Lotus biscuit
- 150g unsalted butter
- And 2x 280g of the Philadelphia cream cheese
The method for the recipe remained the same otherwise.
Storage and freezing
This cheesecake is a fresh product, so must be stored in the fridge. If the fresh ingredients used had a good date, the cheesecake will last for 3+ days.
You can freeze this cheesecake for 3+ months – I would suggest freezing in the tin first, then removing, and storing. SaveSave
Related recipes
Biscoff is genuinely one of my favourite things. My Biscoff cake, Biscoff cookie butter cupcakes and Biscoff cookie butter fudge are just some of the other recipes on my blog using it already and it is delicious – make sure to check out the recipes.
Can I decorate before setting it?
I am planning to make this cheese cake but I was wondering if I can drizzle the melted spread on top of the cheese cake at least 5 hrs before serving it .
What tin do you use for cheesecake?
I made this over the weekend it went down well! The flavour was great but the cream texture didn’t look as well set as the one in your video. Any tips why this might be so I can improve it for next time?
Hi
How many 250ml dessert cups could the quantities of this recipe make?
Hi Jane, I have made this recipe a few times and has always gone down an absolute treat. I’m wondering if the recipe would make 12 individual mini cheesecakes using muffin cases?
Hi,my cheese mixture has been whipping for 25 mins on slowest speed on kitchen aid and is runny…at no point has it been thick! Any help?
What cream cheese and cream did you use? Also, was it always on the slow speed? I whip in the high speed to incorporate air, slow won’t do it!
Did this work? Im looking to do this to take into work.
I’d like to make a cheesecake with the M&S hazelnut crème spread. Do you think it would be okay to follow this recipe but obviously replaced the Biscoff with the hazelnut spread instead? Thank you x
How do I get the biscuit base out of the tin it won’t come off the base. Thanks
We’ve used this recipe three times and it has gone down a treat every time . I’ve had friends and family ask me to bake them one for special occasions now. The best recipe we have found.
Can I use whipping cream instead of double cream?
It may be too low in fat so it’s worth using a setting agent like gelatine if you do x
Absolutely love this recipe always goes down a treat with the family and friends! I have a question about the base some have said that the base has been very hard to cut through am I just over pressing the base or is it maybe too much butter? Or is this just the way it should be?
It could be a combo of both, it’s worth reducing the butter slightly if you want but still pressing down so it’s not loose x